
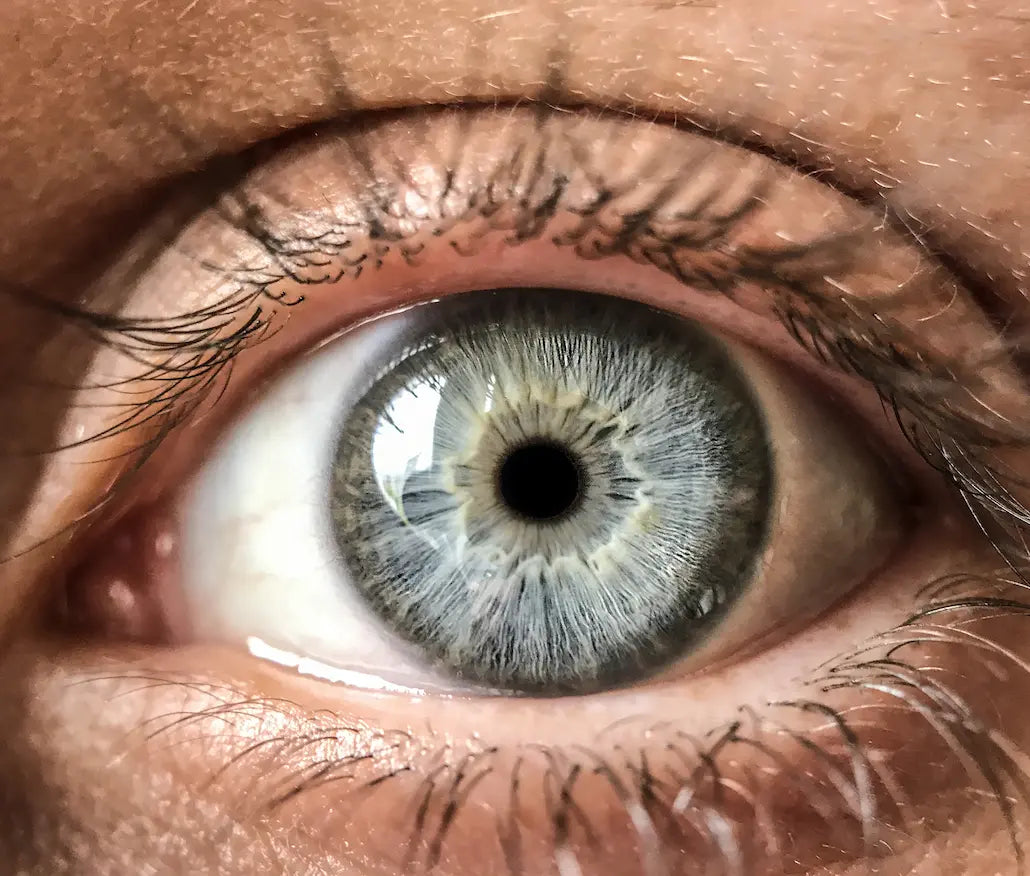

Macro photography is a fairly widespread practice but very little known to the general public. We all have in our heads superb photos of ladybugs in a magical microcosm, but very few people know that we can do the same thing with our simple smartphone and a Pixter Macro. Our smartphones in fact have sensors with a very short minimum focal length which already favors macro. In addition, additional lenses like the Pixter Macro allow you to take superb photos of the small world around us.
Being fascinated by nature and photography, I fell under the spell of this practice.
The basics of a good macro photo are quite simple. We will therefore see what are the ingredients of a beautiful macro photo step by step.
First of all you should know that the macro has a very short focal length which requires you to be almost glued to the subject. This makes shooting more difficult but will delight fans of fixed focal lengths.
For a beautiful photo, the basis is already to have a good subject. And to do this you have to leave the house and go for a walk, objective in hand.

I- Find the subject

The subject of your photo can be plant-based (leaves, flowers, plants, etc.), mineral or animal (insects). The nature of your subject will determine your approach and your shooting. In fact, a flower is immobile and can therefore be stabilized more easily than an insect. To find your subject, don't look with the usual gaze of the photographer who looks for composition in the big things around him. Look at your feet at what can become a work of art in your eyes. It's not necessarily obvious at first, but you have to look at a subject that catches your eye and observe it in order to imagine the perfect shot.
Tips: You will discover that a subject can result in a multitude of different photos. For example, this wilted dandelion contains tiny drops of water and a small insect.
This “minute stop” will allow you to become aware of everything around you and start to approach your subject more precisely.
II- Approach to the subject

Check that your lens is clean, as is the lens of your smartphone, to avoid streaks on the photo and loss of quality.
If your subject is a flower, I advise you, for example, to hold it with three fingers of your left hand and to hold your smartphone with your right hand. You will be able to stabilize the subject and your smartphone by leaning on your left hands. You can also use a tripod.
If it is a living subject, the task is much more complex. You will have to approach slowly as if you were in slow motion. Take into account shadows which can frighten certain insects, and also the wind which can make stabilization complex.


Tips : If it is an insect, it is better to photograph at the first rays of the sun in the morning, or in the evening when the insects go to bed, or even after a rain. Morning and evening lights are beautiful for photos but can create false daylight. This type of tip is also valid for flowers. After the rain, the insects are wet and therefore immobile and remain at the top of the blades of grass to dry. It is therefore easier to approach them and photograph them without them moving. For other types of subjects, rain leaves drops of water which give a very pretty effect and increase the contrast of colors.
In order to get closer to your subject, you can remove the transparent diffuser which may interfere with certain shots. In this case it is not necessary, but it can perfectly scare away or damage your subject.
III- Setting up the framework
To start this part, I will advise you to go to the settings of your phone, in the Camera tab, and activate the grid. This grid will allow you to better visualize the composition of your photo.
Once you've done this, you can start trying different shots by varying the brightness and exposure.
One of the fairly common mistakes is to center the subject in your photo. Unless this is a desired effect, I advise you to use the natural curves of your subject and the grid to create a more dynamic setting. For example, if your subject is looking towards the left, put him in the right side of your photo to leave room for his gaze.
If you want to get more details (the eyes of an insect, etc.), you can use a quarter of the digital zoom on your smartphone. Avoid going beyond a quarter, otherwise you will lose quality.

Tips: If the subject moves, forget all about it and follow it slowly while waiting for it to enter the sharpness zone. If he moves too much, use still subjects to start.
In addition, by varying the shooting angle, the color of the background will completely change and can give nice effects. If you wish, you can use a sheet of colored paper to create an artificial background in a color you like.
I don't like this technique at all, but you can also use dead insects to be able to photograph them from all angles. This approach can be good for starting out, but I personally find that it removes the authentic and lively aspect of the photo, we lose the “on the spot” aspect.
IV- Taking the photo

Once you've located your perfect shot, hold your breath (not for too long) to reduce shaking, and press the shutter button.
You can use burst mode to make sure you have a full set.
Tips: Nature is beautiful to photograph, but above all you must respect it and not damage or disturb it.
Conclusion:
And yes, it may seem long and complex to take a macro photo. Macro is a totally different world, where the slightest shake becomes a big movement on the screen. Taking a beautiful photo is therefore long and tedious, especially with macro. You will probably come back from an outing without a single photo that you think is suitable, but you just have to persevere and it will all become a reflex.
The macro is the most powerful and therefore the most capricious smartphone lens. So if you couple it with the infinite beauty of nature, you get a challenge with incredible potential results.

